
Good Morning Everyone!
I hope your Fourth of July Celebrations were enjoyable! The family and I kept things simple and had a pool party at my sisters house with a cookout followed by fireworks. It was a lovely, relaxing way to spend the day.
With the festivities over, I've turned my attention once again to conquering the weeds in my garden and attempting to give my yard and gardens a little cottage charm.
I thought an easy way to add some charm would be the addition of a simple bench. You can never go wrong with a bench right?
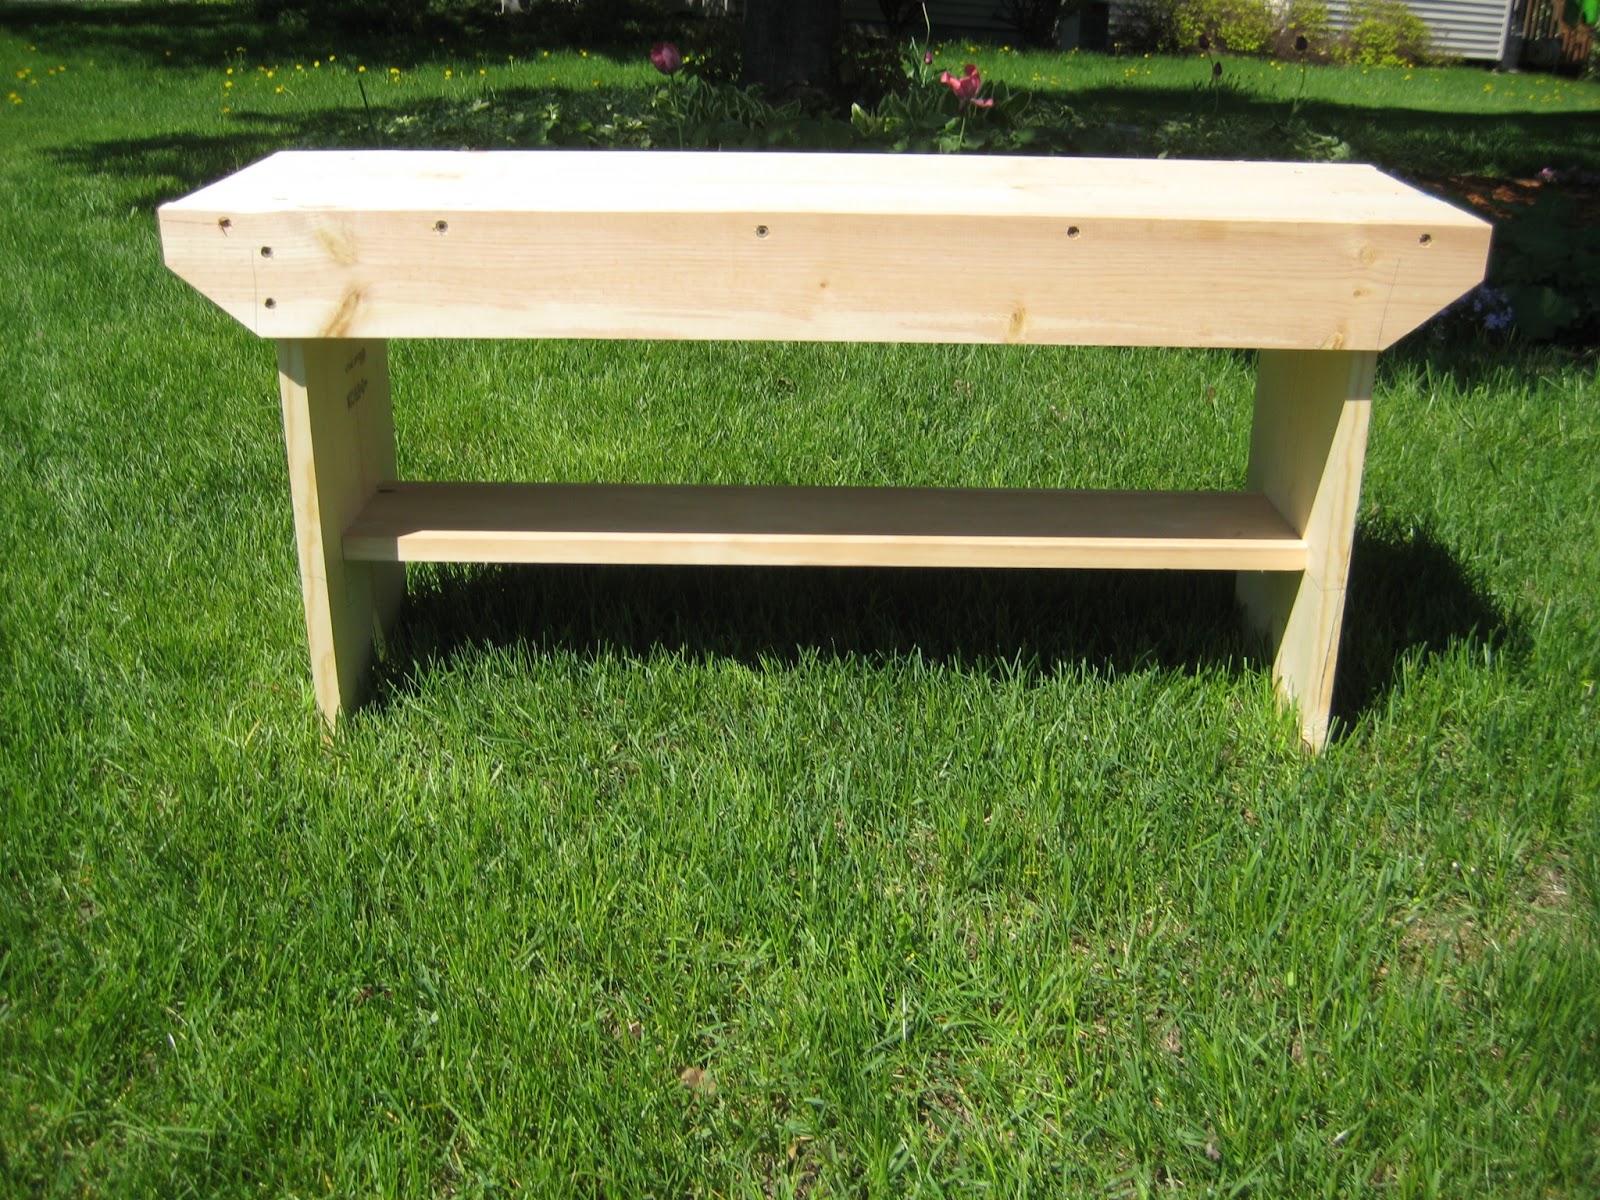
The bench itself is very simple in design and quick to put together. Before I show you how its built, first I'll show you the pretty pictures of it finished and placed in the garden.
The girls have a playhouse set in the middle of the garden boarder that surrounds the fence in our backyard. It's not used very often since they seem to have outgrown it, but every time I threaten to take it over as a potting shed interest in it is renewed. Since I'm not yet allowed inside, I figured I could add to the outside instead.

Here's my new bench.
Simple and painted white, I love how it pops against the blue of the playhouse.
I added a metal bucket filled with flowers to soften it a little. Plus there is always room for more flowers!

Here's a good view of both the playhouse and the garden surrounding it.

And finally,
just because I like my new bench so much I thought this was a pretty photo too!

Alright lets get into the nitty-gritty of how to built a bench just in case your thinking your garden might need one too!
Supplies:
1 - 6 ft 1X10
1 - 6 ft 1X4
1 - 3 ft 1X10
1 - 3 ft 1X8
screws
(I used deck screws instead of wood screws - much easier to work with)
Primer and paint
Step One: Cut the legs to length
Cut 6 ft. 1X10 into two, three foot sections. These two pieces will be your legs. Determine the the bottom of the leg and draw the shape you would like. I wanted simple triangles but you could get fancier if you'd like. Using a jigsaw, cut out the shape on one of the legs and then use it as a template for the other leg. Mark the design, cut it out and you will have something like this.

Step Two: Cut the decorative size rails.
Cut the 6ft. 1X4 into two, three foot sections. Determine the shape you'd like. You could leave it as is, curve it or do a simple notched look like I did. Without measuring anything, I simple picked a spot about three inches in from the edge of the board as a starting point on the bottom and used a scrap piece of wood as a guide to angle out toward the outside edge. Once I had an angle that looked good, I marked the angle, then using a jigsaw cut it off. I guess basically I just cut a triangle off the bottom corner of the 1X4. I then used the cut off triangle for a template on the other side of the 1X4. Once the two ends where cut, I layered it over the remaining 1X4 marked the shape and made my cuts. The end result is two, 1X4 with notched edges. These will go along the top of the bench on the outside as a decorative piece.

Step Three: Cut the top piece to length
The material list says to use a three foot section of 1X10. I had a six foot section so I simply cut it down to the size I wanted.

Step Four: Attach legs to top of bench.
Taking your three foot section of 1X10 determine where you would like the legs to attach. I like to bump the legs in about three or four inches from the edge. I simple drew a straight line where I wanted the legs attached. I then drove three deck screw halfway into the wood along the line. This step makes the next step much easier.

Tilt the bench top on it's side and place the legs on the backside to form a "T". You can see I have marked the side of the bench top where I want the leg to line up. This makes things easier for me and I know that when I drive the deck screws the rest of the way through the wood it will all line up. Starting with the top, pre-drill screw, drive it in the rest of the way. Do the same with the other two, pre-drilled screws. Repeat the progress on the other side of the bench with the remained leg piece. You should then have both legs attached to the top of the bench.

Step Five: Attache decorative rails.
With the bench still on it's side, simple place one of the side rails along the edge of the bench and attach with screws. I also attached the side rail to the legs with a two screws on each side.

Step Six: Attach foot rail.
Taking the pre-cut three foot 1X8 determine where you would like to place it. I placed mine about three inches above the top of the triangle peak of the legs. You can see here I marked a guide for both how far to place the 1X8 in from the side of legs and a guide on which to center the 1X8. Drill screws from the outside of the leg, through the leg itself and into the foot rail. Do this on both sides to attach the foot rail.

The finished project should look like this! At this point you could fill the screw holes in with wood putty and the paint. I skipped that part and when right to the painting since the holes don't bother me at all.
Have a great day,
Robin
A darling bench and it looks so nice in front of the play house. But I stopped at 'jigsaw'. I'm not handy with tools at al1. We have a playhouse too and every time we talk about getting rid of it my 16 year old balks eventhough she has not set foot in it for a year or more.
ReplyDeleteLove the bench and the bucket of flowers! It adds charm to the space for sure.
ReplyDeletecute little bench!!! cannot wait to see what you do when the playhouse officially becomes yours. I am sure it will look amazing!!!!
ReplyDeleteI love your little bench, Robin! It looks perfect outside the girls' cute playhouse! And thanks for the great tutorial, too!
ReplyDeleteI love it. Simple is my middle name.
ReplyDeleteLove the bench. I want one for my house...longer and maybe in red or blue.... Thanks for the info...Blessings!~
ReplyDelete
ReplyDeletelove the bench and it looks so good in front of the play house. Hope you get to use it as a potting shed soon.
Have a terrific week.
Mary
I think it is just awesome that you made this bench yourself! I am definitely not that talented. It really looks great against the playhouse, very cute and simple. I think you have a great cottage look going! :)
ReplyDeleteXO,
Jane
Robin, I've been wanting to make one of these for at least five years. I thought it was going to be a whole lot of cutting and stuff. I think I can do this. Thanks for the tutorial!
ReplyDeletefear of god outlet
ReplyDeleteoff white outlet online
ggdb outlet
off white clothing outlet
steph curry shoes
golden goose
supreme outlet
off white
air jordan 1
off white