It seems I've begun a new evening routine that is quickly becoming my favorite part of the day.
Every evening after homework and dinner clean-up is completed I sneak off to my studio for an hour or two. It doesn't take long for the girls to discover where I've gone. They'll either join the crafting merrymaking, or simple sit down around the table to chat. Occasionally, our resident clarinetist will come serenade me while I work - which is always a treat for me. Rarely does a night pass when at least one, if not all of my girls stop by for a little while. For a Mamma who feels her babies are growing up much to fast this time together is Oh. So. Sweet!
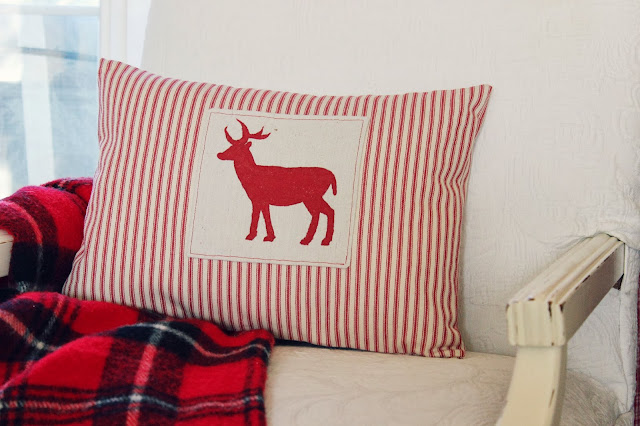
My latest creation fresh out of the studio was a true delight for me to work on. At Christmas time I'm obsessed with bottle brush trees and vintage toy deer . . . it only seem natural to add a deer silhouette to a easy pillow cover.
I love how it turned out! Cute right?
In case you've like to make your own here is a quick run-through of how I put it all together.
Find a piece of fabric you want to paint your shape onto. Press the edges to the back side.
Flip it over and trace your shape in the middle.
Grab your favorite colored craft paint and a brush.
And start filling in the shape.
While the paint dries, find some fabric to make a simple envelope style slipcover with. I used a red ticking stripe. Cut out three pieces. One front and two back pieces. Finish one edge on each of the back pieces.
Once your painted shape has time to dry completely, center the fabric square in the middle of your pillows front piece. Pin, and straight stitch around the outside. Remove pins.
Next, start layering your fabric to sew together. Front piece on the bottom, right side up. Followed by one back piece, right side down . . . followed by the final back piece, right side down. Like below.
Pin all the layers together and then sew around the outside of the fabric with a straight stitch. Remove pins and slip the pillow inside to check the fit. Once you have the fit you like, remove the pillow and zig-zag along the outside to prevent fraying. Turn right side out and insert pillow. That's it.
(I have a more detailed tutorial here if you'd like to check it out)
Oh Boy! That's too cute . . . May have to make some more!
Hope you all have a great day,
Robin
Linked to:
Amaze Me Monday
Give Me The Goods
Tweak It Tuesday
The Inspiration Exchange
Be Inspired
Feathered Nest Friday
Fabulously Creative Friday
Give Me The Goods
Tweak It Tuesday
The Inspiration Exchange
Be Inspired
Feathered Nest Friday
Fabulously Creative Friday


Love all your country red accents! and the deer pillow is perfection as well!
ReplyDeleteThank you! It tuned out perfect for my living room.
DeleteJust adorable, Robin!
ReplyDeleteWhat a fun pillow.
xo
Sheila
Love it Robin, the striped red fabric you chose was perfect for this project too!
ReplyDeleteThat's awesome ... well done!
ReplyDeleteAbsolutely festive!
diane @ aug's blog
That is indeed too cute! I would never have thought to trace the image on and then paint it - great job!
ReplyDeleteP.S. Your header is drop-dead gorgeous!!!!!!!!!
Beautiful pillow, and I love how it looks with your blanket! I'd love if you'd link up to The DIYers. http://homecomingmn.blogspot.com/2013/12/the-diyers-40.html
ReplyDeleteVERY cute! Great job! :)
ReplyDeleteSusan
Another wonderful pillow. You are just sooooo creative and sounds as if your kiddos are too. Your craft room sounds like the gathering room...Enjoy those precious times with them while they are with you.....they grow up so quickly! Have a great one....Blessings!
ReplyDeleteAdorable indeed! I want it!
ReplyDeleteJeanine
That is just beautiful, my friend! You inspire me so much!!!
ReplyDeleteAnd you sound like the kind of mom every kid needs.
Hugs, Cindy
Robin, can I use a picture of your pillow on my blog to tell my readers to come over here to see it? Thanks!
ReplyDeleteI love it, Robin! It turned out beautifully! (you should have an etsy shop!) I love that you and your girls hang out in the studio together...
ReplyDeleteIt is precious! I love your holiday header too!
ReplyDeleteBrenda