March 28, 2013

Springtime Hutch

 
While I was pulling items together for my springtime hutch I didn't have much of a theme or an idea really of what I wanted to do.
 
I did know that I wanted the space to have a bright, open feeling to it. 
 
With that in mind, I tried to keep things to a minimum, making sure to add only items I wanted to highlight and to keep the "fluff" at bay.


On the top of the hutch I reused many items you may remember from past posts. 
 
The beadboard star I made ages ago, and the sign from a couple years back.
 
I'm sure I've used the white birdhouse in the past at some point also but the blue and white birdhouse is a newly painted one from Micheal's.


The right side of the hutch was filled with mostly white items with pops of blue and green.


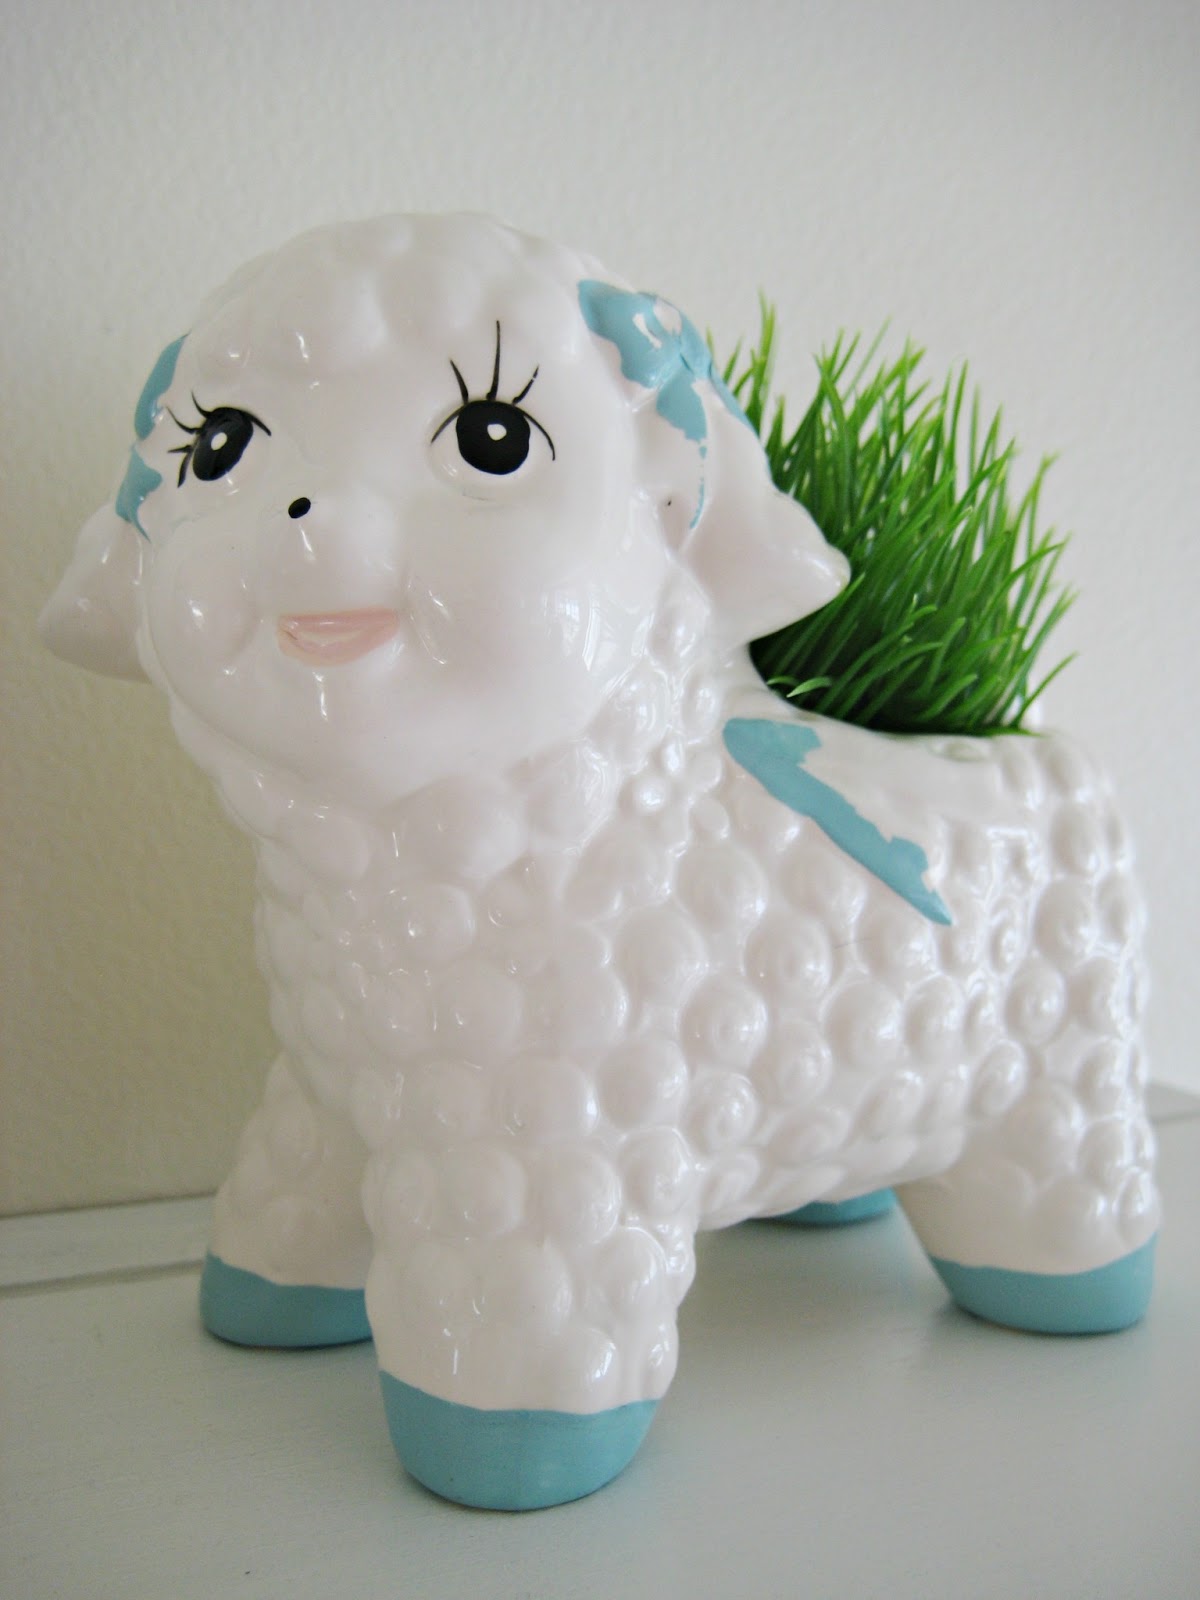
This little bunny made the cut.  Look how adorable he is - He's a fav.


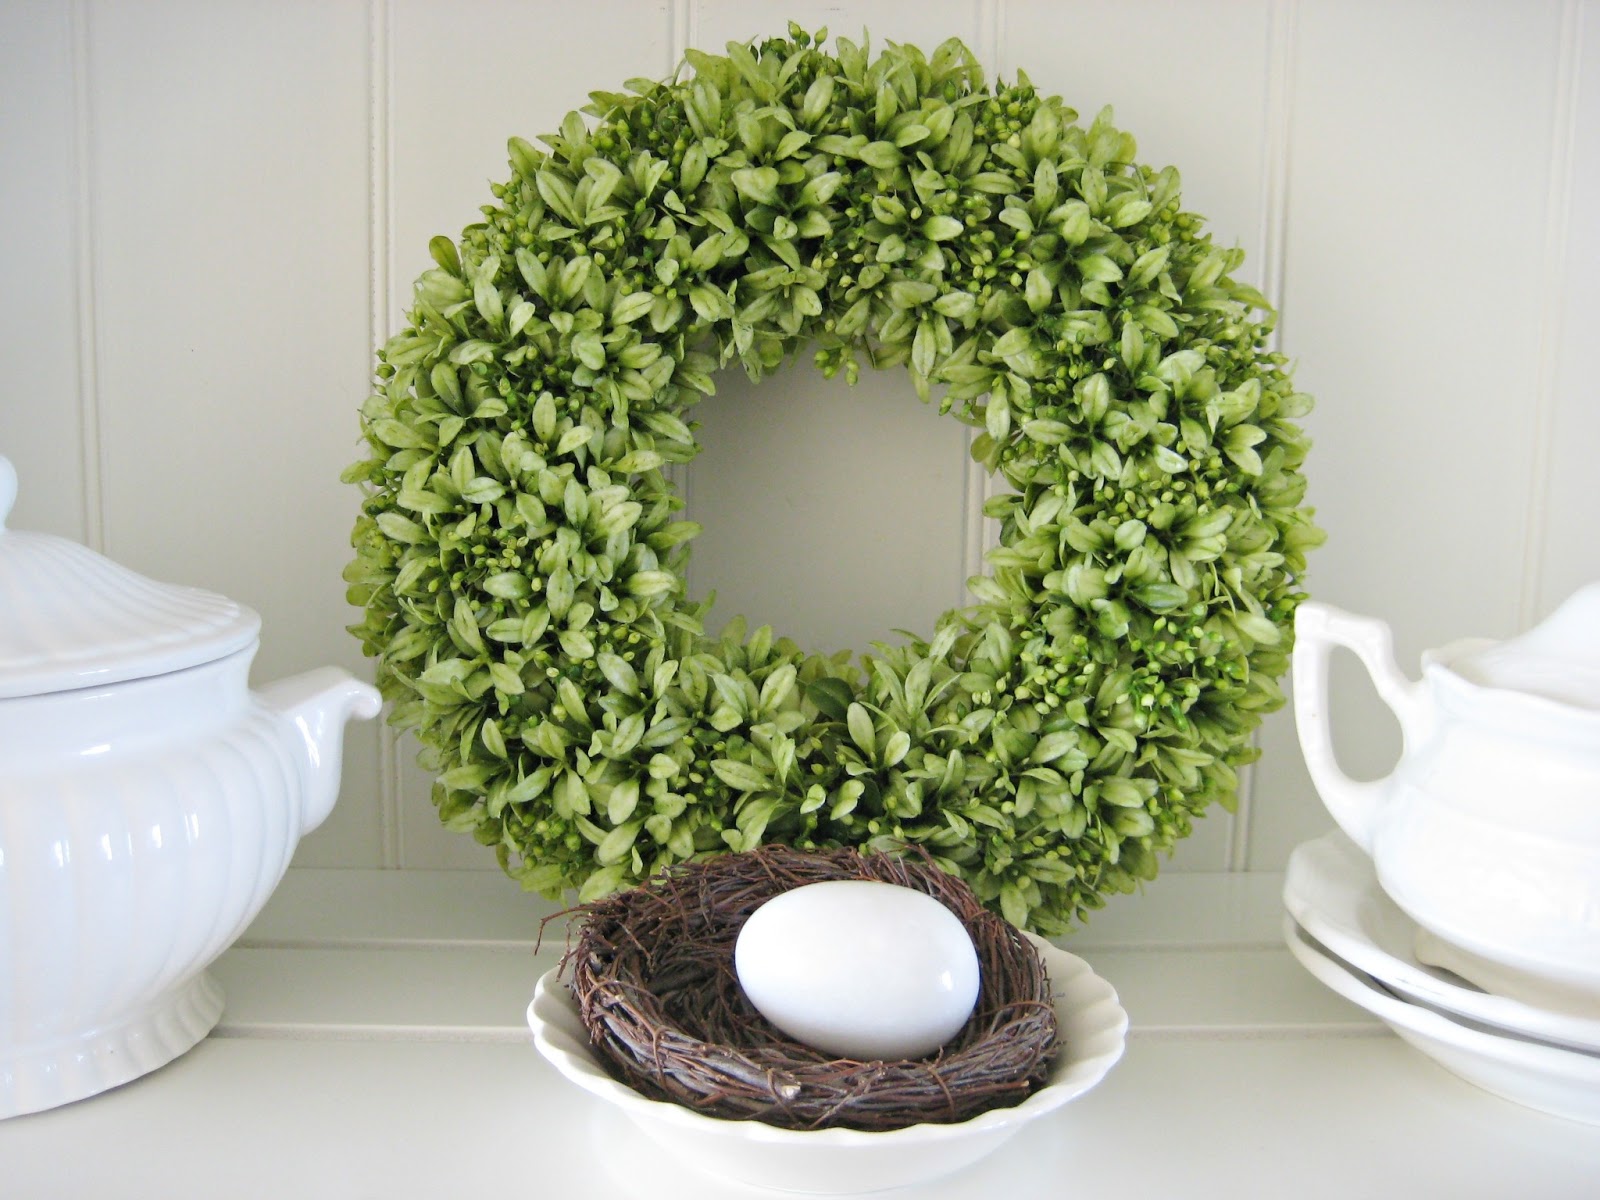
So did the boxwood wreath I made last year.  It's the perfect shade of spring-like green don't you think.


The other side of the hutch received more white items and a hint of blue.
 
I forgot to take a photo of the glass jars up close but I love the simplicity of it.  
 I swear I should use this idea somewhere else in the house since I enjoy it so much.


Another burlap photo mat and a recently purchased plate with pretty blue flowers fills the last shelf.


All in all, I'm very happy with how the hutch turned out.  It seems I don't always have to have a plan to put together a pretty look!  But Man!  It sure is nerve wracking when your in the thick of it.  LOL.
 
Today I finally finished up my living room spring makeover and I can't wait to show you.  Just waiting on some sunshine to take photos.  Technically the hutch is in the living room but for some reason I always think of it as it's own space - weird huh!
 
Have a great day everyone and I'll talk to you soon,
 

March 27, 2013

Springtime in the Dinning Room


For my springtime decorating I've taken a simple approach.  

Simply adding items that I enjoy and colors that I love.  

The desk in the dinning room has a new arrangement.  I've kept my farm sign since I still adore it.


I filled the wood box with simple items that I thought worked together.


On the wall behind the table, the shelf received a new chalkboard, vintage clocks and my collection of sheep.


Can you believe this is my first chalkboard?  I'm a little behind the times, but I'm cool with that.  LOL.


Found this cute little lamb at the thrift store.


The same day I found this one.
A little cutesy for me I'll admit, but somehow spring brings that out in me.


Last year I found this adorable vintage planter and fell hard for it.  I think it looks adorable filled with faux grass.


And finally, the last item of my collection is the one that started the collection.  I love this cheerful, colorful planter like nothing else.   It makes me smile every time I see it.


To complete the dinning room, I added this newly purchased plant stand in the corner.  The stand will be moved out onto the covered porch once the weather warms up enough.  For now it add an over-sized element of interest to the corner.


I still have to figure out what I am going to do for my dinning room table.   Just found out yesterday that I will be hosting Easter this year.  I'm thinking something simple like hydrangea's in glass jars but I'll be sure to share once I figure it out.  

Have a great day,  
Robin

March 26, 2013

A Hankering For . . . Classic Cars


I have a slightly new obsession with vintage cars. 
 
It's a dream obsession really.
 
Can't tell you how it happened, I'm not much of a car person.
 
Maybe it's from watching too many re-runs of Mad Men, or perhaps it's just an extension of my love of so many different types of vintage items.
 
Whatever the reason, I'm hook. 
I've even gone so far as to drag hubby and the kids to the local community park during a Classic Car Show.  I have a feeling it's an obsession that isn't going away anytime soon.
 
And why should it? 
 
Who wouldn't want to zip on over to the local gas station for a gallon of milk driving one of these . . . .
 
Pinned Image
 
Or how about letting the kids pile into this 1956 Wagon and take them all on a picnic to the beach. . .
 
Pinned Image
(Source:  Pinterest)
 
Oh, but this beauty is just begging for a road trip . . . .
 
Pinned Image
 
 
Now I'm not sure how I feel about this pink car. 
Other than I've never seen such a tough looking pink in all my life! 
I'm just not sure it's "me" . . .
 
Pinned Image
(Source:  Pinterest)
 
I think perhaps I should stick with something more in my groove like this red and white beauty!
Looks like it has plenty of room for the me and the kids.
 
Pinned Image
 
And speaking of my groove, and all things "me",  can't get more like myself than loving something like this  . . . .
 
Pinned Image
 
But then again, maybe Vintage Campers shouldn't be in a "Hankering" category all by themselves!
 
Have a great day,
 
Robin


March 25, 2013

Follow my blog with Bloglovin

Vintage Book Display

Vintage book collecting is so much fun!  

My collection is constantly growing.  
I'm always on the lookout for new treasures to find in the correct color, size and type.  Of all the types of books I collect, my favorite are children's early reading books.  I love their fun graphics and cheerful colors.

One book in my collection is a particular favorite of mine.  It's called "Happy Days With Our Friends".  Such a delightful title isn't it?  Every one of my girls have snuggled up next to me to read from this book during their kindergarten and first grade years.  We have found this type of book to be very helpful for the early reader, since most of it is very sight word based and it works nicely with the modern curriculum taught in my girls classrooms.  

Sadly, this happy, cheerful book has seen little use in our house as of late.  Since it holds such warm memories for me I wanted to find a way to use the book in my decorating for spring.

Surprisingly, only a little bit of jute twine was needed.  I simply tied a piece around each side of the book with a simple knot.


The twine holds the pages open and makes it easy to prop the book up on a shelf so we can see the pretty, cheerful illustrations.


I am so happy I gave this quick and simple idea a try.  It's prefect. 

I'll show you where I used it soon, once I have the rest of the room finished. 

Talk to you soon,

Robin

Linked to:

The Scoop
 Be Inspired
 

March 21, 2013

A Hankering For . . . Garden Structure's


With spring here, my mind has turned towards all things gardening.

I've spent the past few years figuring out my favorite plants to grow and I feel as if my gardens are looking pretty much as I would like them.

I'll be adding a few more plants of course, what gardener can resist something new?  

But for the most part my focus won't be one the plants this summer.  
Instead, I'll be focusing on structures or ornaments to add a little cottage interest to the garden beds.

Classic, simple items that will enhance the garden, and hopefully shift the eye away from the weedy mess come August!  LOL.

I've been looking around in hopes of inspiration.  I've gathered a list of sorts . . . 

A wish list really, of all the things I would love to add to my landscape.

A pyramid trellis, or two, painted white.

Pinned Image
(Source: Pintrest)


A birdhouse . . . .


Pinned Image


(source:  http://tickingandtoile.blogspot.com/2012/02/in-garden.html)


Or perhaps two!

Pinned Image
(source:  http://www.mrmcgregors.com)

An Arbor over the entrance to the vegetable garden would be very nice.

Pinned Image
(Source:http://www.7sisters-bb.com/tour_garden.htm)

Maybe something homemade would be fun,  like this . . . .

Pinned Image
(Source:  http://www.itsnotworkitsgardening.com/2011/02/project-comes-off-list-sort-of.html)

Or maybe this . . . .

Pinned Image
(Source:  http://crumpledenvelope.tumblr.com/)


Oh, and of course some urns filled with pretty flowers are a must!

Pinned Image
(Source:  http://aquieterstorm.tumblr.com/)

Have I forgotten something?

What would you add?

Oh! almost forgot!  

This addition would be the ultimate don't you think?

Pinned Image


I'd surround it with flowers and shrubs


Have a great day,

Robin

March 20, 2013

Burlap Photo Mats


It sure doesn't feel like Spring here in Minnesota!

It's sunny, yet bitter cold and windy.

Inside things are beginning to look a little more Spring-like.

I've been slowing working on transforming my Living Room to give it a easy, breezy spring feel.  I'm not completely finished yet but I can share one of the quick projects I feel helped me get the look I was hoping for.

I found two over-sized photo frames at the thrift store a while back and knew they would be prefect on either side of my large window. I gave them a fresh coat of paint and then a little distressing.  That's when I hit a snag.  I had nothing that would fit into the big frames.  I searched and search with no luck.  Finally, one morning last week I had an idea.

I remembered a handful of  botanical prints I picked up at Junk Bonanza last year - Perfect!  The prints worked nicely but then I hit snag #2.  No photo mats to match the frame size or the print size.

That's when I decided to try burlap.  
Guess what?  It worked!!


I had very pale, almost white burlap on hand - my favorite type.
I simply cut the burlap to match the size of the glass and centered the print in the middle.


I had enough burlap at use on both large frames . . . 


Plus a handful of smaller frames.  Just because I was loving the look so much.  

The burlap gives the frames a nice added texture.  I have found that I like to make sure the backing behind the burlap is not white.  I think it looks best when I used the plain cardboard backing most frames come with.  It helps define the burlap a little better then a white background does.


What do you think?

Are you enjoying the look as much as I am?


Have a great day,

March 17, 2013

Refinished Farmhouse Table

 
Good Morning !
 
Hope you all had a wonderful weekend.  I kept myself busy decorating the house and taking long, glorious afternoon naps.  It was lovely.
 
Many of you know I've been working on giving my kitchen a makeover.  It's still not ready to show off, but I can't keep myself from showing a few peeks at the projects I've been working on for the room.
 
Take this table for instance . . . .


It used to look like this when I found it at the thrift store. 
You may remember it was originally bought to place on my gravel patio come springtime.  After realizing how great it fit the kitchen, plans for the patio where abandoned.


After sanding down the entire table with an electric sander, the table is now sporting a new, improved look.
 
 
The base was painted a creamy white color and then distressed heavily  . . . . 


The table top was given a simple protective coat of clear sealer to show off all the pretty imperfections in the wood and to add a little warmth to the mostly white space it's sitting in.


I can't tell you how excited I am about this table.  I real farmhouse style table has been on my wish list for years.  The fact that I finally found one perfectly suited for my kitchen has me more excited than I could ever express in words.


I am truly amazed at the difference this single table has made to the whole feel of the room.  It seems much more cozy and friendly and somehow much larger in size.
 
 
Talk to you soon,
 
 
Robin

March 14, 2013

Homemade Drip Mat


I know that drying racks aren't all the rage but I seriously can't image a kitchen without one.

For years I've used a ratty dishtowel underneath to catch the water but with all the fun stuff happening in my kitchen I figured it was high time to make something pretty.


Can you image a more perfect addition than red ticking stripe?  I think not.


This project took a total of five minutes - seriously super easy.

One piece of ticking and one piece of an old towel.  I put the two pieces right sides together and then sewed around the outside leaving an inch and a half gap to turn the fabric right side out.  I simple closed the gap by machine stitching it closed.  I like the look of a double stitched line so I ran around the outside edge a quarter inch from the original stitch line.

Super simple. 
I made the drip mat extra long and wide since I tend to fill up the outside with small items.


The drying rack itself I found at Target a couple years ago.  
I fell for it's small size, red feet and basket.


Have a great day,

Robin

March 13, 2013

A New Quilt


Good Morning Friends!
 
I'm back . . . finally! 
The kitchen project is almost complete.  I've done everything I can do on my own.  Now it's time to call in the big guns, aka hubby.  I'm hoping he  can install some new lighting once I make my final decision and then I'll be able to show it off!  Yippeee.
 
Until then I've jumped back into my normal mode of decorating and crafting.  I'll have some fun stuff to show you in the upcoming weeks as I slowly start changing my homes decor for spring.  I love this time of year yet I feel as if I need to work semi - slowly.  We're still in full winter mode here in Minnesota, snow yesterday.  But there are signs of spring also.  The tree in the front year is starting to bud and few days ago I saw two geese - - a sure sign in my neck of the woods that spring will be here soon.   If this year is anything like the past few years, one day is winter and the next it's spring.  My goal is to have my decorating done early so I can go outside and enjoy myself once it finally does arrive.  I'm in serious need of a balmy day with the feel of a light breeze in my hair and sunshine on my face!

Today I'd like to share a quilt I just finished. 
This has been one of those project I felt would never end.  I started it months ago, then would pack it away only to get it out and work on it a little then pack it away again.  I was hopping to finish it before Christmas to use in my bedroom, but clearly that didn't happen.  It still works in my room since I've kept the red and white theme all winter.

 
The quilt itself is a copycat sort of thing.  Can't remember where I first saw the triangle pattern but I do know I fell hard and fast for it.  I was determined to attempt making my own.


For the inside, triangle pattern, I purchased new fabric.  For the outside bands I used fabric from my stash in an attempt to use some of it up.


For the backing I purchased new red ticking stripe fabric.  This was a step I debated about but in the end I am so happy did.  Now I can use either side of the quilt depending on my mood.

 
I have to say this quilt is the perfect napping quilt.  Its the perfect weight and I look forward to weekend naps under my new quilt.


Hope you all have a great day,
 
Robin
 
Linked to: